Showing posts with label drag around quilt. Show all posts

Sunday, October 2, 2022

Jack's Drag Around is Almost Finished

 Jack's quilt is almost finished.
Once I started working on the blocks it went pretty well. After not doing any quilt sewing for a while I seem to have developed some better habits. I have done more planning before jumping in and starting to cut without a solid plan. 
I knew what I wanted to do before I cut anything and I knew what I needed to shop for. One trip to shop for solid fabrics beforehand was way better than starting and then finding I needed something I didn't have and that I had wasted some to my focus fabric.


I knew that not all of the squares would  have one whole recognizable object but I didn't see that as a problem. Partial objects would work if little people where looking for certain things, like signs and  wheels and cranes and the shovels on front end loaders. 


After I cut these 36 squares I tried to sort them but I came to the conclusion that the best way was to put them on a design board in the order they were before cutting. That seemed the best way to avoid the headache of trying to keep from having too many of the same things too close together.
I started laying the squares out by lining up the squares the way they were cut. That went well for the first few rows but then I started a row that didn't line up perfectly with the row above.  I probably got interrupted at some point and maybe misplaced a square or two or maybe a few. I stuck with the plan after only a few shuffles. I knew once I sewed on the solid strips no square was going to line up along the cut lines. I kept all of the squares in this order  and started adding the short strips to the correct side, right, left, top or bottom. As I pinned each solid strip I moved it to my design wall.


This photo is the bottom three rows with the 4 1/2 inch strips pinned to the side where it needed to be sewn on. I saw the pattern of every other strip in the row being in the same position and every other row was the same. I only realized there were 2 only different rows when I got to the third row. I just didn't see it looking at the photo of the whole layout.


This is the printout from EQ that I used to layout the short solid strips. I use these little sign holders with a printout or picture of what I am working on. 
Sometimes I have a printout of the cutting directions
and sometimes a printout of block construction.

In the background you can see some of the mess in my sewing space which is undergoing a redo. Going along slowly but going along. 


This is how I made sure I was looking at the correct row. Masking tape is an essential tool in my sewing room. That square with the short strip pinned on the is the next one that got sewn on. 

Everything went together without a hitch. Well, after I sewed the very first strip to the wrong side on the very first square..
After all the short strips were sewn on, the long strips were fast and easy, in spite of many interruptions. 
When I started sewing the rows together I kept them up on the wall until i was ready to sew any particular  rows. it seems like with only six rows I could just take them down in pairs and sew them together. I have come to recognize that even with only a few things to keep in order I have mixed up the order, even when there have been no interruptions. I accept my shortcomings. The rows went together with on problem.


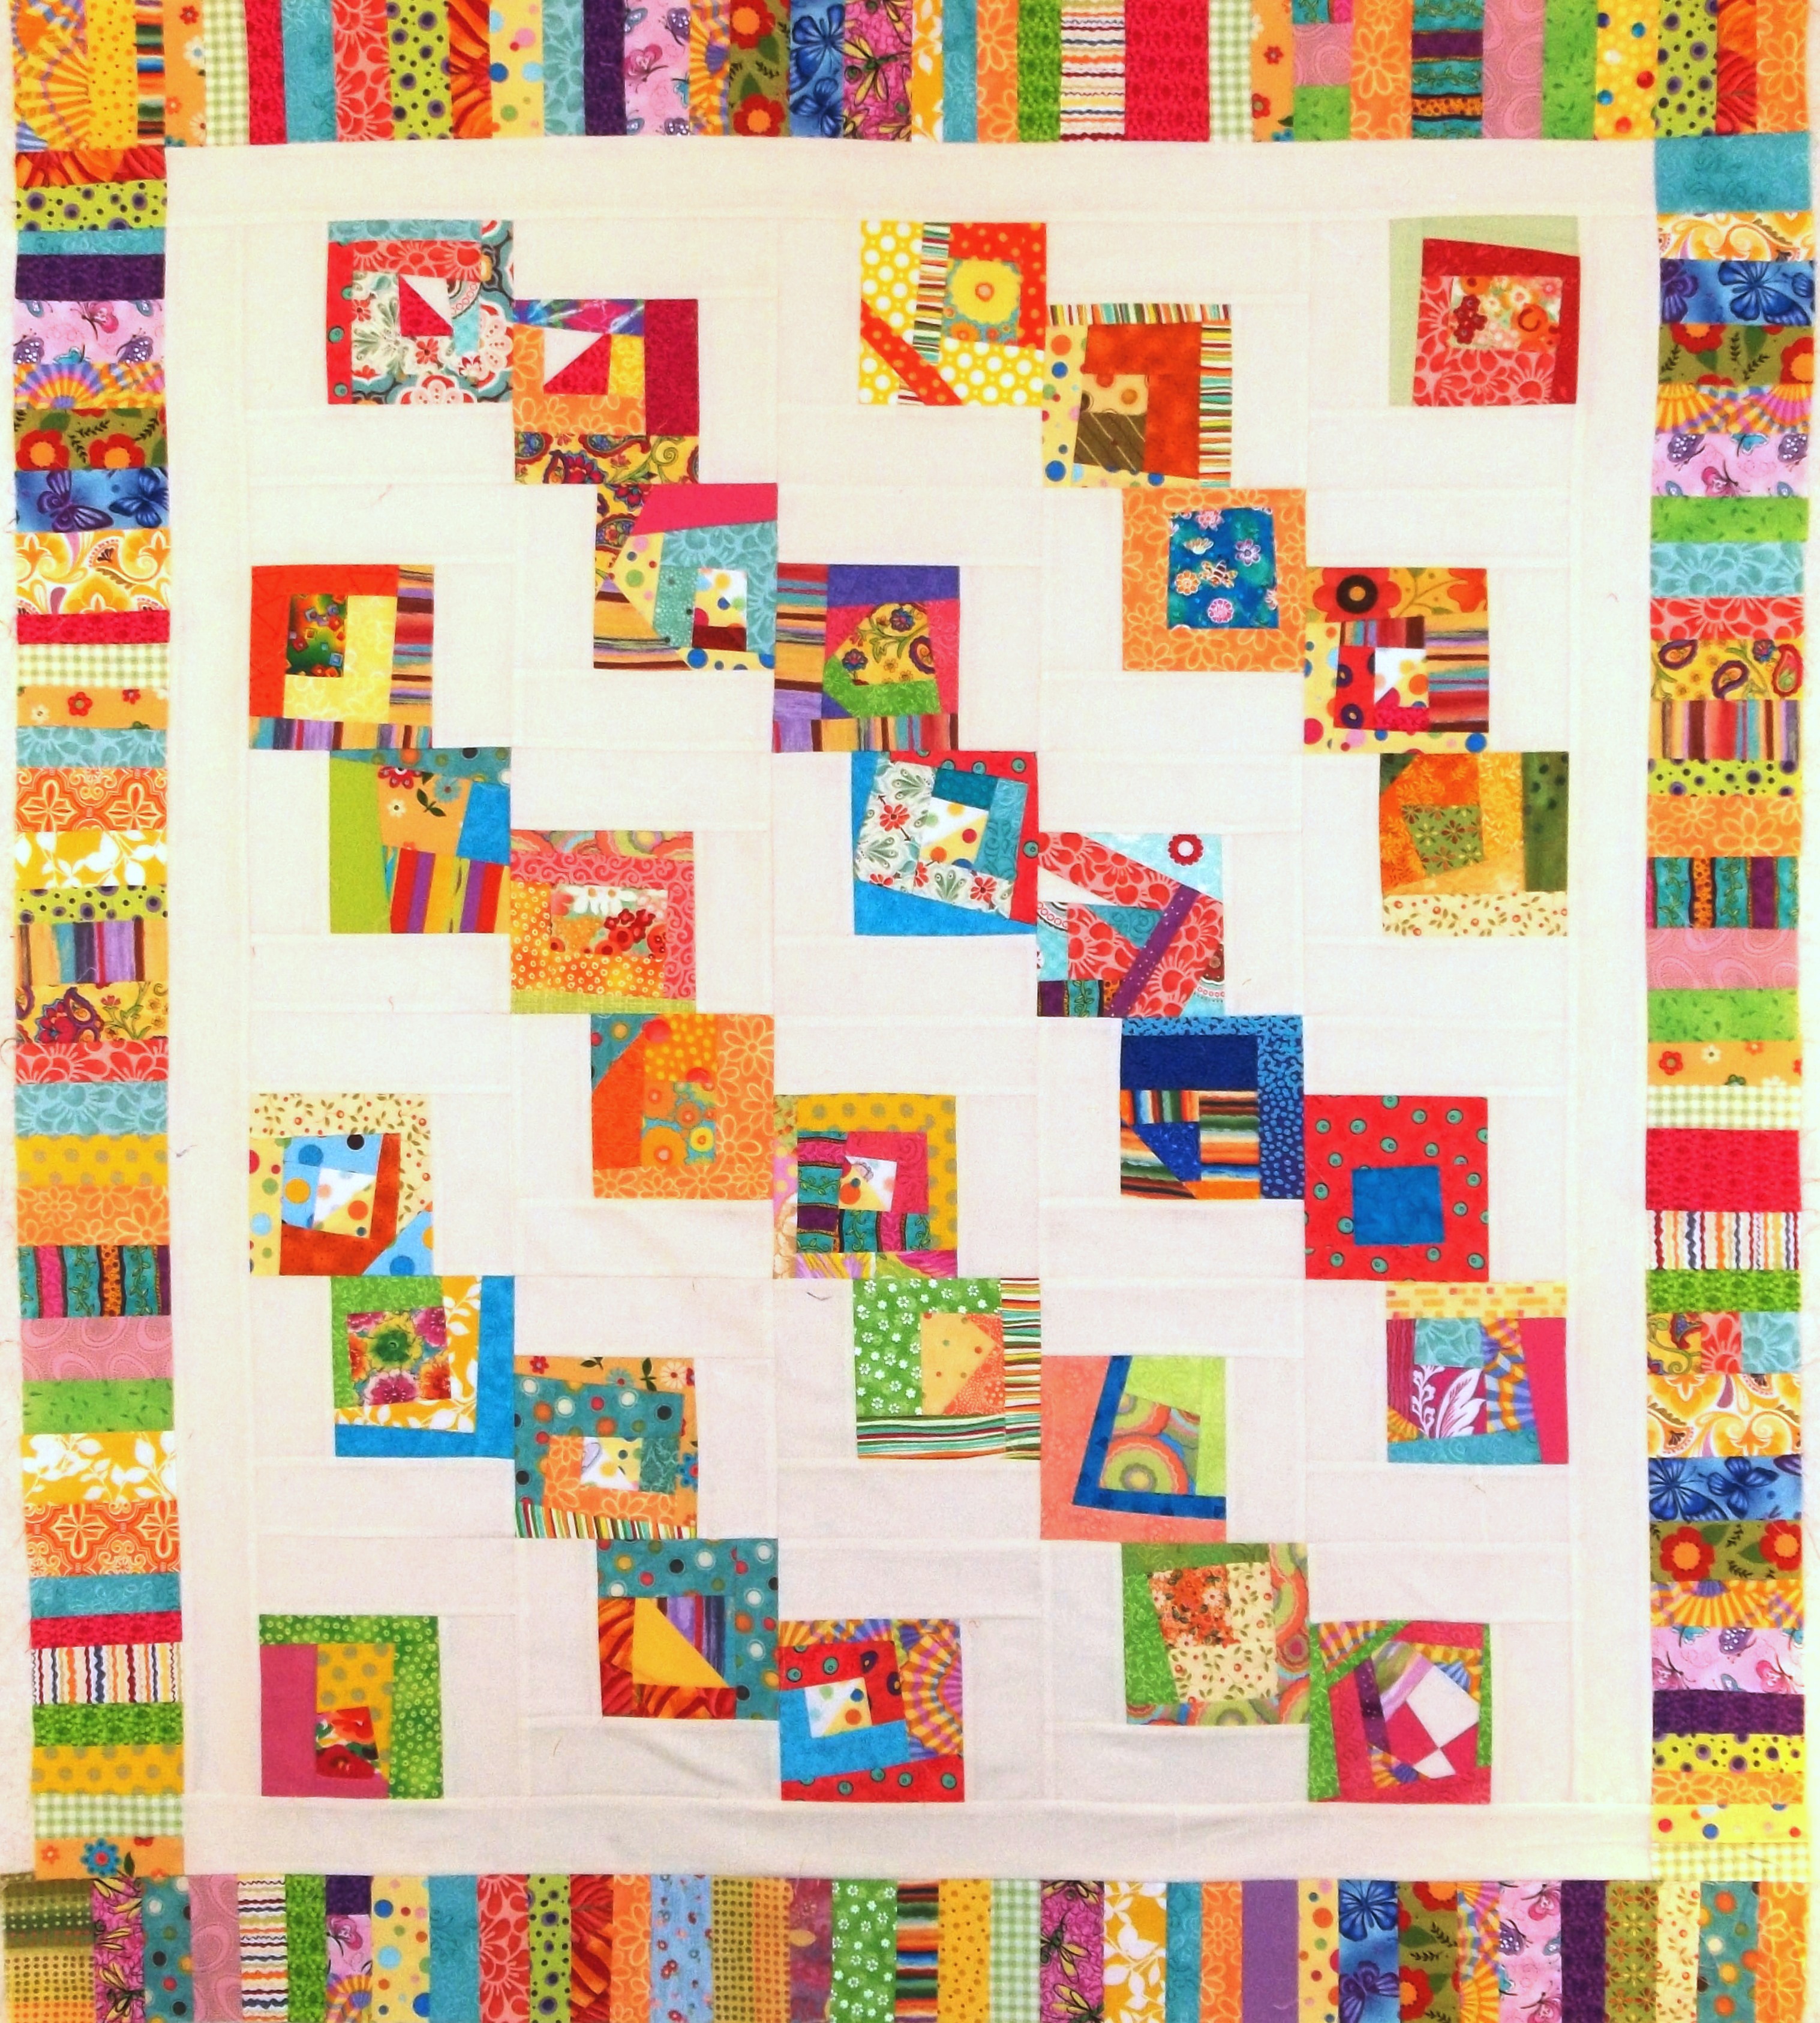
Here is the finished top. The borders are different that any of my EQ borders, which I only added in EQ as place holders for size. I never make decisions about borders until the body of the quilt is finished, 
unless some times the border is designed first. 
I knew from the beginning, the focus fabric was not going to work for the size border. I knew I would use solid fabric but I didn't know what I would use until I auditioned  the fabric. Yellow seemed the obvious choice. I didn't want the yellow to look chunky in the corners around the yellow blocks. I solved that by adding red strips sewn on at right angles to the yellow border strips.  The binding will be red.

It is layered up and pinned and ready to quilt. I am contemplating the options for quilting while I straight up the sewing space. I have learned that I need to have some sort of order around me as I move from one step of the process to the next.  Otherwise, I am pushing things out of the way and making another mess that gets in the way of everything I do.

Saturday, September 24, 2022

Jack's Drag Around Quilt


 I have made a small start on great grandson Jack's drag around quilt.  I thought I knew exactly what I wanted to do so I worked out the borders in  EQ. Thankfully I did not do any cutting. I thought I wanted a 30 inch square in the center surrounded by pinwheel blocks. I thought I would quilt around the construction objects in the square but when I looked at the size of the square and the number and placement of the objects I quickly discarded that idea.


This is the EQ version with the scanned fabric in the center. For the border, I decided that I would cut 6 1/2 inch squares and alternate them with pinwheels, maybe!

Discarded that idea and went on to doing other things while keeping the possibilities in the back of my mind.


I remembered this "Tumbling Charms" quilt that I made from a Missouri Star Quilts video.
Instead of Charms I use "made fabric" squares.
Click here for another quilt from the same pattern.


This is my EQ version of the original tumbling Charms layout using solid colors, pulled from the construction fabric for strips on 2 sides of the print squares. I thought this would be the quilt layout. However....................................


I recolored the strips and played with this version in EQ for a few days. I discarded this after another recolor in EQ.


This was the next version in EQ after discarding the yellow strips in each block and making each block with short and long strips of he same color. 
I  really thought this would be the final version.

However i decided to play with the Symmetry tool. It flips and rotates all the blocks at once in different patterns. I think it changes to about 17 different layouts before going back to the original. I went through them all as it only took one click to turn the whole layout


This is the final version after going through all the options and making some changes without the Symmetry tool. I discarded all the other layouts after thinking about them for a few days.

I like this kind of jumbled up layout because it isn't so predictable and static.
This is going to require a little more attention to the placement of the solid strips on the correct sides of the print square. The print is directional and I want all of the print squares in the same direction. There are many elements in the print that would be fun for little people to look for and count. I believe that the scale of the print would make that harder as well as giving the quilt a disorderly appearance if the direction of the squares were mixed up.

I have printed the layout in color, and by using EQ for the layout I should be able to sew the solid strips in the correct position for each block.  I have not yet decided whether the strips will finish 1 1/2 or 2 inches. That is a decision for the design wall. I will start out with 2 1/2 inch cut strips and see how it like it. If I don't like the way it looks I can cut them down to finish at 1 1/2 inches and cut the rest of the strips 2 inches. 

All I have to do now is find the time to work on this. I never really appreciated what a blessing it was to have all the time I needed to do whatever I wanted to do. We'll see how it goes.

Monday, January 29, 2018

First Finish for 2018

I have a first finish for this year and it is not the one I thought it would be. I finished quilting the Fancy Forest but it still needs the binding.

Here it is folded in half on my table; the quilting is all in the ditch.

My camera will not take any more photos so this is the best I can do for today. I tried to use my old camera but all I can see on the viewing screen is a blur. I guess it is time for a new camera.
This is the one I finished, it is a 27 inch square "drag around" quilt. This is for our preemie great grandson; he went home from the hospital 3 days ago. I think it is about the right size for a 5 Lb. baby.  I want to send both of these with my daughter when she goes to see him this week.

I had planned to use the scraps from the Fancy Forest quilt to make crazy improv blocks but though that is easy, it is not fast. I looked around for something I could put together fast and found these wonky blocks in my "Parts Department" box. I have a bunch of colorful small blocks that I made when the Basement Divas group was planning on making Collaborative Quilts in the style of Freddy Moran and Gwen Marston. We did make one quilt but then the group took another direction, I had forgotten about these blocks and it was really by chance I opened that box. There were 8 blocks and I made the purple block using fabric from the Fancy Forest owl block. I used left over fabric from the FF backing for the border and the purple for the binding.


I sewed the binding to the front and turned it and fused it to the back. I was careful to cover the line of stitching on the back so that the stitching in the ditch on the front would catch the binding.  It takes me forever anymore to do hand stitching with my crooked arthritic fingers.
This photo shows one corner of the back folded up to show the stitching on the binding and the stitching in the ditch on the front. When I get to the corners I stitch out to the point and back to the ditch. I works well and I find it a little easier each time I gain a little more experience.