Sunday, October 14, 2012

Friends Quilt Together

Yesterday was our monthly quilt group meeting at church. Our church is a Friends Church so we called our group "Friends Quilt Together".  It is a good name for us.
We had some old quilts yesterday that came from the family of 2 of our members. This quilt that Dorine and her niece Jamie are holding is from the 1940's and was made by Dorine's grandmother and that would have been Jamie's great grandmother. It was pieced on the machine and hand quilted.


This next quilt was made by Dorine's  great grandmother and has many different fabrics. The dark background fabrics are many different velvets. All of the hand stitching is done with one stitch and she used many different colors of Perle cotton. 
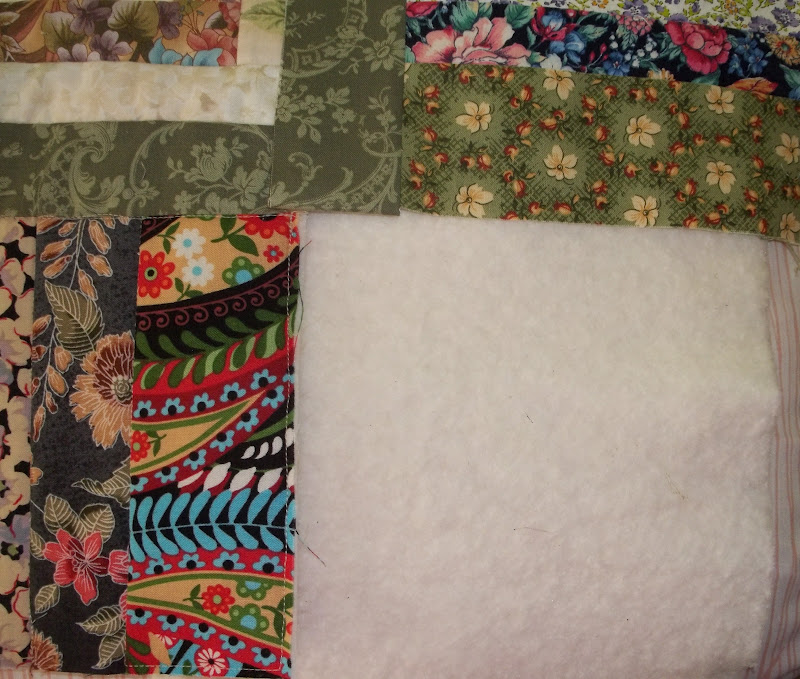
close up


Jamie is a new quilter and she has been coming to our meetings for a few  months. She got a little frustrated with some of our blocks of the month but that didn't  stop her. Dorine encouraged her to start with some more basic things and these next two quilts are hers. The first one was a charm pack and she went back later and  got the border fabric. the other quilt is a Christmas quilt. These are both in the flimsy stage. Jamie will be getting married soon and moving away for a while so we are happy to see that we didn't scare her off with our BOM. We think she is probably going to continue quilting where ever she goes.

Betty made these two quilts using our donated fabric. I think she started them at our retreat. Both of them are finished and went into to our caring closet.


 Elaine made this last lap sized quilt from  our donated fabric. The pattern was from a Missouri Star Quilt Company tutorial. It is in the flimsy stage in this photo but she layered it up, quilting it and sewed on the binding yesterday. It will go in our caring closet also.


I was not very productive yesterday but that is not unusual. I did  go through a box from our closet labeled "strips to cut" and after Elaine sewed her binding on she helped me. I  think when Dorine and I cleaned the closet we put stuff from various boxes in this box to be sorted and organized another time. There were a lot of strips of different sizes already cut and pieces that need to be cut and some things to dispose of. It still needs to be finished up but we separated things so we will be able to get it all organized next time.

Thursday, October 11, 2012

Long time no post etc.

I got an email from a friend today wanting to know if I was OK as I had not posted anything for a while. There is really not much going on and what is happening is not very satisfactory. Who wants to post or read about something that is not going well.

I am not happy about the baby quilt I have been working on  for church. The poly batting is very slippy, slidey and a pain to get pin basted, with many more pins than I usually use. and the quilting looks a mess. I am not sure what I will do. It is ready for binding and I need to buy something but I am not sure anything will make this good enough to give away. 'Nuff said about this.

I have one quilt top that has been hanging behind the sewing room door for several years. It is in 3 long sections ready to layer up and quilt and then put together. This picture is of 2 sections, that is all I have room to lay out.
I think the reason I never completed this when I made it is that I was intimidated by matching all those seams after quilting it. I am not worried  about that anymore. I have made a lot of quilts that I quilted in sections and it is no more difficult to match seams than when the whole top is put together before quilting.
I get this out from time to time and think about finishing it. Today I am looking at that bottom row and I think I need to make 6 more 12 inch blocks to go on the bottom of the 3 sections to  mirror image  those triangles to make them squares(that is 2 blocks for each section).  I made this after I had cut all my scraps into squares of various sizes and I know I have some of these same fabrics in my box of squares. I gave away all my 4 inch squares a year or 2 ago but I have cut more. There seems to be no end to all of my older pieces of fabric. I still have an over abundance of 3 1/2 inch squares cut. Maybe I will do this.....soon. I would really like to get his one done and gone. We'll see.
I  love making scrap quilts but sometimes you have to make something with all new fabric and maybe that is what I need to do. The Basement Divas will be starting a new challenge this month and I am thinking about doing it with all new fabric.
In the meantime while I am rolling all this around in my mind I will make my Friendship blocks for September and October.


Monday, October 1, 2012

A Week of This and That

After I finished all the place mats and hutch mats I straightened up my space and looked at the stack of things I had sitting around to finish up. I wasn't really excited about some of them but I didn't have anything pressing so I worked on a few.
I  worked on this baby quilt that I had started along with a couple other people at our church group retreat. We have so much donated fabric that we really have to start using it. The trouble with donated fabric is that there isn't usually enough of one thing to make a whole quilt. Over a year ago I bagged up some colorful fabrics with some Kona Bone and instructions inside for making 3 different blocks with like components. I thought that if everyone made blocks we could make some row quilts.  There were a lot of bags still  sitting in the box and most of the blocks that were made went into this quilt. One of our ladies had put together a box with larger pieces we could use for background; we found some fabric we  could use for the in-between rows and some white for the strips between the blocks. I just needed to sew the row together at home. I  would have finished it but the backing I brought home was so thin you could see the front of the the quilt through it. I  am going to buy some baby print on a white background and something colorful for the binding.  I think we need to stick with one block pattern for a quilt, maybe something like pinwheels that goes faster. Maybe we should give up on having everyone make just blocks. Personally, I  am also more inclined to stick with lap quilts for nursing home residents as we have more suitable donated fabric for those quilts. Anyway this one is on hold until I get out to shop.

I made 3 more snack mats for the great grand kids. Now all the pumpkin fabric is used up, every last it of it. The ones with the striped  borders are 3/4 inch larger to better accommodate a drink and small plate. Now I am really finished with mats of any size for a while.


I started working again on the second tree skirt. I  used Annie's tutorial ,which is very good, I took it along to the retreat but never worked  on it. It is pretty much like the first one as I used the Blitzen charm packs like I did for the first one. I had previously sorted  out all of the squares in the order I wanted to put them together. I stacked each row and pinned it and stacked the rows in order. It went together pretty fast. I had worked out a way (for me) to keep everything in order as I have a tendency to get things mixed up.

After it was all finished I  found this on the floor. That pretty much explains why I had to take out some seams and  fix an area where in 2  places the same fabrics were next to each other. I had extra wedges that I had left over from making too many for the first tree skirt. I must have put them in with the rest when I was doing the cutting, then somewhere in putting it all together these fell on the floor.  Oh well........................... better too many than not enough. The final result has the correct number of wedges. I am making the Prairie  Points and will shop for a backing. 


Tuesday, September 25, 2012

Hutch mats


I cleaned up the leftover from the place mats and found so brown strips that I had dragged out looking for possible  binding before I bought more orange  fabric for  binding. I decided I  would make 2 fall mats/runners? for my small hutches. They are 15 x 25 bigger than a place mat and smaller than runner; I guess they are hutch mats. I often put bread baskets, salad bowls, desserts, etc. here and I like to have something under them. I have something for Christmas, spring and summer and never got around to making anything for fall. It took me all day by the time I decided what fabrics I wanted and cut and auditioned each and every strip.  I am happy to finally have fall hutch mats.

When I was putting everything away I started thinking that maybe I should use the little bit of left over pumpkin fabric to make a snack mat for my great grandson. He and his mom live across the street and sometimes he is here after school; he is always ready for a snack.
Can you tell I do not have another project to start on? I am rolling the next Diva challenge around  in my mind but not ready to start and there is nothing else I want to do right now.

Sunday, September 23, 2012

Place mat Backs


 I finally finished up  hand stitching the binding on the back of the "Take Four" place mats; that was a lot of hand stitching. If I had given it more thought I might have sewed it first on the back and turned it to the front to finish on the machine. Once I did the first 2 I just kept going and did them all the same. They look good and now that they are finished I am happy I did the hand stitching.  These are the backs of the mats for my granddaughters. I made 2 each of these for one of them and 2 with the pumpkins for the other one; the fronts were all from the take 4 pattern.


These are the front and back of the two that I made for my daughter with the leftovers. I had cut orange for the binding but decided on the green. I think that it was a better choice.

I have three 2 1/2 inch orange strips left over  and a little of everything else. I am putting it with my scraps where someday I will be happy to have them. Right now I am tired of them and want to work with something else. I know my daughter will like hers and I am pretty sure about one granddaughter too but I am hoping the other one will not be disappointed with the colors.

Thursday, September 20, 2012

A Finish

 
Front
I finished the binding on the Spiral Log Cabin quilt yesterday. I have it pinned up on my design wall for this photo. It is smoothed out on the batting on the wall and that makes it look distorted but it is really nice and straight. I really like this quilt. In person it  has luminosity which was a nice surprise. Almost all of the fabrics are floral and the border has a kind of color wash look to it. Jack calls this the Gigi quilt because the blocks look like G's. He asked what I am going to do with it using a tone of voice I have come to understand that he wants me to keep it. He also asked if it will fit our bed. I am going to use it on the bed as it fits the top of the bed from pillow to foot and hangs over the sides a few inches. I have a white furry blanket that fits like a coverlet and this looks good over that. I will take it off at night as the blanket is really warm but it will  be nice to snuggle under when I take a nap.

Back


This is the back; I used extra blocks and piano key sections to stretch the yellow fabric. I have 2 yellow pieces left, about 6 x 8 and 3 x 8.


I sewed the binding on the rest of the place mats and I had some pieces of fabric left over. I made 2 more place mats for my daughter. When she saw the ones I was making for her daughters, she reminded me that she uses place mats too and that those are the colors she likes. It made me feel that I should make her something too. They are different, I just made something up to use what I had left. I will use the green fabric for the binding and with 2 wide strips of the pumpkin fabric for the backs.
 I still have a fair amount of decent size scraps left so I plan to make some mug mats. My goal is to use up all of this fabric except small  pieces to feed the small scraps and strings boxes.

Tuesday, September 18, 2012

Productive Tuesday

The first thing I did this morning was take everything out of the small coat closet just inside our apartment door. Jack told me it was gong to rain on Tuesday and it would be a good day to work on the shelves he promised to build. I have a very small kitchen and have been putting extra pantry items on the floor of the closet and in various unhandy places in the limited kitchen cabinets.
There are 4 shelves 12 x 24 inches and 14 inches apart. They fit under the hanging bar so we can still use it for our coats. This may not impress anyone who has lots of space but it sure makes me happy. I rearranged my kitchen cabinets also since I made some space there. Jack used my cutting table for a while while he was putting it all together so I took the opportunity to clean up in my sewing room and vacuum the  floor.


I have been working on the borders for the spiral log cabin for 3 days and they are finally on. I only accomplished a little yesterday. Today I finished the hand stitching on the back where I added the top and bottom borders. Then I trimmed off the batting along the edges to prepare for the binding.
This is how I decided to deal with the corners; I made 6 inch blocks with the green fabric squares making a diagonal line, I added a 2 inch strip to one side to make it fit the border and after I squared off the inner green border. My seam ripper is pointing to the strips I added.  
In this last picture the seam ripper is pointing to the corner that didn't fit right. I measured and pinned and unpinned and and trimmed and fitted and I still came out almost 1/4 inch short. At this point it is what it is. Tomorrow I will add the binding and then I will be done.  When it is all finished I will show pics of the front and back. Maybe I will also get the binding done on the placemats.

Saturday, September 15, 2012

Back to the scrap pile


Front and Back

This morning I finished quilting the last 6 placemats. I had finished 2 on Thursday with orange binding and decided that the orange fabric was the only one that looked really good. I had used all the orange that I had and I emailed the quilt shop and Beth at Cotton Pickers Quilt Shop brought it last night to our quilt guild gallery show where she was vending. That saved me a trip to the shop this morning.

I washed it this morning and while it was still damp I put in the freezer (makes ironing easier). While I was waiting for it to freeze I put the second side border on the Spiral Log Cabin quilt. I am suspending work on the last two borders until I decide what to do about the corners.

This was my original intention for the corners and I don't like it.   I made 4 Spiral log cabin blocks this morning and I was going to set them in the corners like the picture on the left. I don't like that either.

So, this is where I am right now. I think the inner border strips need to be  squared off and I am going to make another 4 blocks. I am thinking dark strips with light corner stones or maybe I will make framed squares with 3 inch squares and strips around them to make the blocks fit the borders.
Keep in mind that these borders will be quilted before they are added so they have to be accurate. I also have to piece the backing for the borders and I am working with barely enough backing fabric. I have a friend who says "there is nothing so easy that you can't make it difficult". She is right!

Right now
I am going to get my frozen fabric from the freezer
 and press it.

Friday, September 14, 2012

Quilting in Sections

I have been following Melody as she does QAYG and she has been featuring QAYG stories from other quilters. I have been quilting in sections for 10 -12 years or more. I don't call it Quilt As you Go because I usually finish up the whole top, in sections before I start layering and quilting and then I put it all together.  However, it really is the same thing.
My first  quilt in sections was a King size quilt for my bed with my new 14 inch mattress. I wanted to quilt it myself and I wanted to do it on the machine and I knew that I was not going to be able to do that all in one piece.
 
front

 I made my sections 16 blocks square which turned out to be 28 inches. I made the log cabin blocks with all floral fabrics and I decided that since the back was going to be in sections I would use all florals on the back as well. I pieced the sections in 4 patches with 7 inch squares or 2 patches and a rectangles or 2 rectangles or one 28 inch square. This photo of the front corner shows one 16 block section (plus a part of the next section on the right) with the borders, which I think I added at the end but I may have added them to the outside edges before quilting, it is hard to tell. It may look like I have added joining strips around the sections but that is just the outside rows on the log cabin blocks. When I am ready to join the sections I fold the backing out of the way and trim the batting and the front even, then I fold the front down and trim the batting 2 x my seam allowance which on my machine with my walking foot turns out to be 3/8  x 2 =3/4. then I sew the edges of the fronts together and hand stitch the back edges.


back
This photo is the same corner on the back of the quilt. I had not left extra fabric on the back sections to allow for the take up in the quilting so after I joined the first 2 sections I added narrow strips on the backfor the rest of the quilt. For all of the quilts after the first one I have allowed extra for turning under the edge on the back.  Narrow strips were not part of the design on the front so, Yes, I hand stitched the back and that is usually what I do.
This quilt is very large and I can't lay the whole thing out on the floor to photograph and it is very heavy so I  don't have any photos of it being held up and it would not fit on my design wall.


Front with 1 border

This is what I am working on right now. I had quilted the body of the quilt in one piece.

the first photo is the piano key border being quilted in the ditch along all of the seams; on the right  the border has been added to one side of the quilt top.  The photo below is the back of the quilt showing the edge I had finished with  hand stitching.

Back with border


After I finish adding one section and do the hand stitching on the back I finish any quilting from the front to complete the design. It needs to be finished before adding another section in order to minimize the  bulk under the arm of the machine. 


The last photo shows the machine quilting that was added after joining the sections on the king size log cabin quilt.

I quilt anything larger than a crib quilt or a throw this way. I don't always divide the quilt in the same way as that depends on the design.

I have a quilt in 3 long sections hanging behind my sewing room door; it has been there for several years. It is all half square triangles and I have been hesitant to match all those points after quilting. I think it is time to "get over it" and get it done. Maybe that will be my next project.

Monday, September 10, 2012

Retreat

Our annual fall retreat from our group at church was this week end. We go to a YMCA camp about an hour from home. Here are pictures from our first retreat. I only took a few  pictures on Friday and that was it. I guess I was too busy unsewing patches.
I made 8 place mat fronts from this pattern. It is a nice easy pattern and I could have finished all 8 place mats in 2 1/2 hours, more or less but at one point I stopped reading the directions and thought I missed a step. It is a stack, cut, shuffle and sew pattern and I missed a shuffle after the vertical cuts; I didn't shuffle the stack on the right. I had to take out 10 vertical seams and shuffle the right side stack. That should have been 8 seams, right? It would have been but  I had mixed up 2 of the narrow strips and redid them. It would have been OK to leave the right side stack unshuffled but after I found the mistake I knew it would bother me. It didn't take that long to fix.  As it turns out I did not miss a shuffle I had it right according to the pattern. I never learn; I know that before ripping out seams I should make sure that it is indeed wrong. However designer of the pattern says that you will probably come up with many more versions beside the 4 she includes. So mine is just another version.


Here is one set of fronts, the other set is the same.
I also finished up a few blocks from our BOM demos and I plan to use them in small projects. They are from different years and were different sizes and in differnt stages of being finished as they were to shows steps in making the blocks.

Everyone worked on their own projects and also some of our group block or quilt projects for our "caring quilts" to go in our closet to give away. There were a lot of finished projects and lots of progress on the almost finished.

Betty gave us a tutorial on a mini little twister project. The little twisters were 2 or 2 1/2 inches finished; they are really too cute.
It was another fun week end and we would all like to do it again in the spring or early part of the year but we tried that twice and it never worked. When you live in the "lake effect" snow belt you don't know if you are going to be able to drive an hour away from home especially to an area right on the lake. We are thinking a Friday night and Saturday retreat at the church might be a good idea for January or February. We'll see. Our church always has a lot going on and it isn't always easy to fit in another event for people to plan around.


Wednesday, September 5, 2012

More Progress

I was rattling around yesterday waiting for Jack to get home. I didn't want to drag out anything to start something new because I am getting  things together to take with me this week end for our church quilting group retreat. I have stacks of things I want to pack and I don't want to get them mixed up with other things.
I decided to quilt a few blocks on this spiral log cabin quilt.It has been layered up and pin basted for months.   I have not been eagerly anticipating quilting this; I thought it was going to be tedious. My reasoning was that I would do a few blocks here and there and eventually get it done. In reality, it was a breeze to quilt, I just followed the inside line of the dark spiral to the center and then kept going on the other side from the center out to the edge of the block and moved on to the next block. All my ditches are quilted. Why did I think this was going to be hard? I have 24 blocks quilted and 16 more to go.

I started this last summer using Beth Shibley's tutorial from Love Laugh Quilt. I loved the looks of her baby quilt and the tutorial is very easy to follow. I had decided to quilt this in sections with the body of the quilt as one section and then quilt the borders and add them. I had done the usual agonizing over the borders and finally decided on piano keys. I was not looking forward to getting out all the strips and making the piano key borders. Then I remembered something! Last week when I was cleaning EVERYTHING I came across something that had a little strip of selvage tied around it. I didn't really pay any attention to it but I knew it was something to keep because I had bundled it up. I set it aside and didn't even think about it until I was looking here.

These baskets are on the top of my bookcase and I put things there I intend to work on soon. I was really looking to a pattern I thought might be there.


I saw this in the basket and once again it registered as something to keep. Today I remembered it and looked at it and YESS! It is my 7 inch piano key border strips. I made them when I made the blocks.


 I will add them to an inner border strip and layer them with that yellow mottled backing fabric that was also in the basket. After they are quilted I will add them to the quilt.

I think I also have the batting set aside; I came across that when I was cleaning and I bundled and labeled all my batting odds and ends and I had these long narrow strips. I am glad I was too busy at the time to sew because I was thinking of cutting them for mug mats and other small things.
Should I say it again?
Sometimes
 things turn out
 Just Right!

Saturday, September 1, 2012

Another small finish


9.5 x 10.5 wide orientation

I have a bunch of small things that have been hanging around for a while. It is nice to work on them and be able to have something finished for my effort.

These photos show two different orientations 

9.5 x 10.5 tall orientation

I layered this up with batting yesterday and started quilting it. This morning I trimmed around the quilted circle and layered it with the black background and batting and backing and quilted the background and again over the main design lines in the circle, then satin stitched around the outside of the circle. I finished it up with binding and corner triangles. I like the extra dimension with the 2 layers of batting behind the circle which makes 2 levels of quilting inside the circle.

Back

I like to use the triangles in the corners for hanging so that it can be oriented with any side up. I  can use one of those easel type plastic sign holders or a piece of stiff poster board or cardboard to use it in a decorative easel or with a little flat balsa wood craft stick to hang on the wall with a thin little nail.